How to put a wide photo on an upright page
Every page in the book is upright. Your favourite photo may not be
Every page of a Micro-Memoir is upright: taller than it is wide. So when I show people how to make their first pages, I suggest starting with an upright photo.
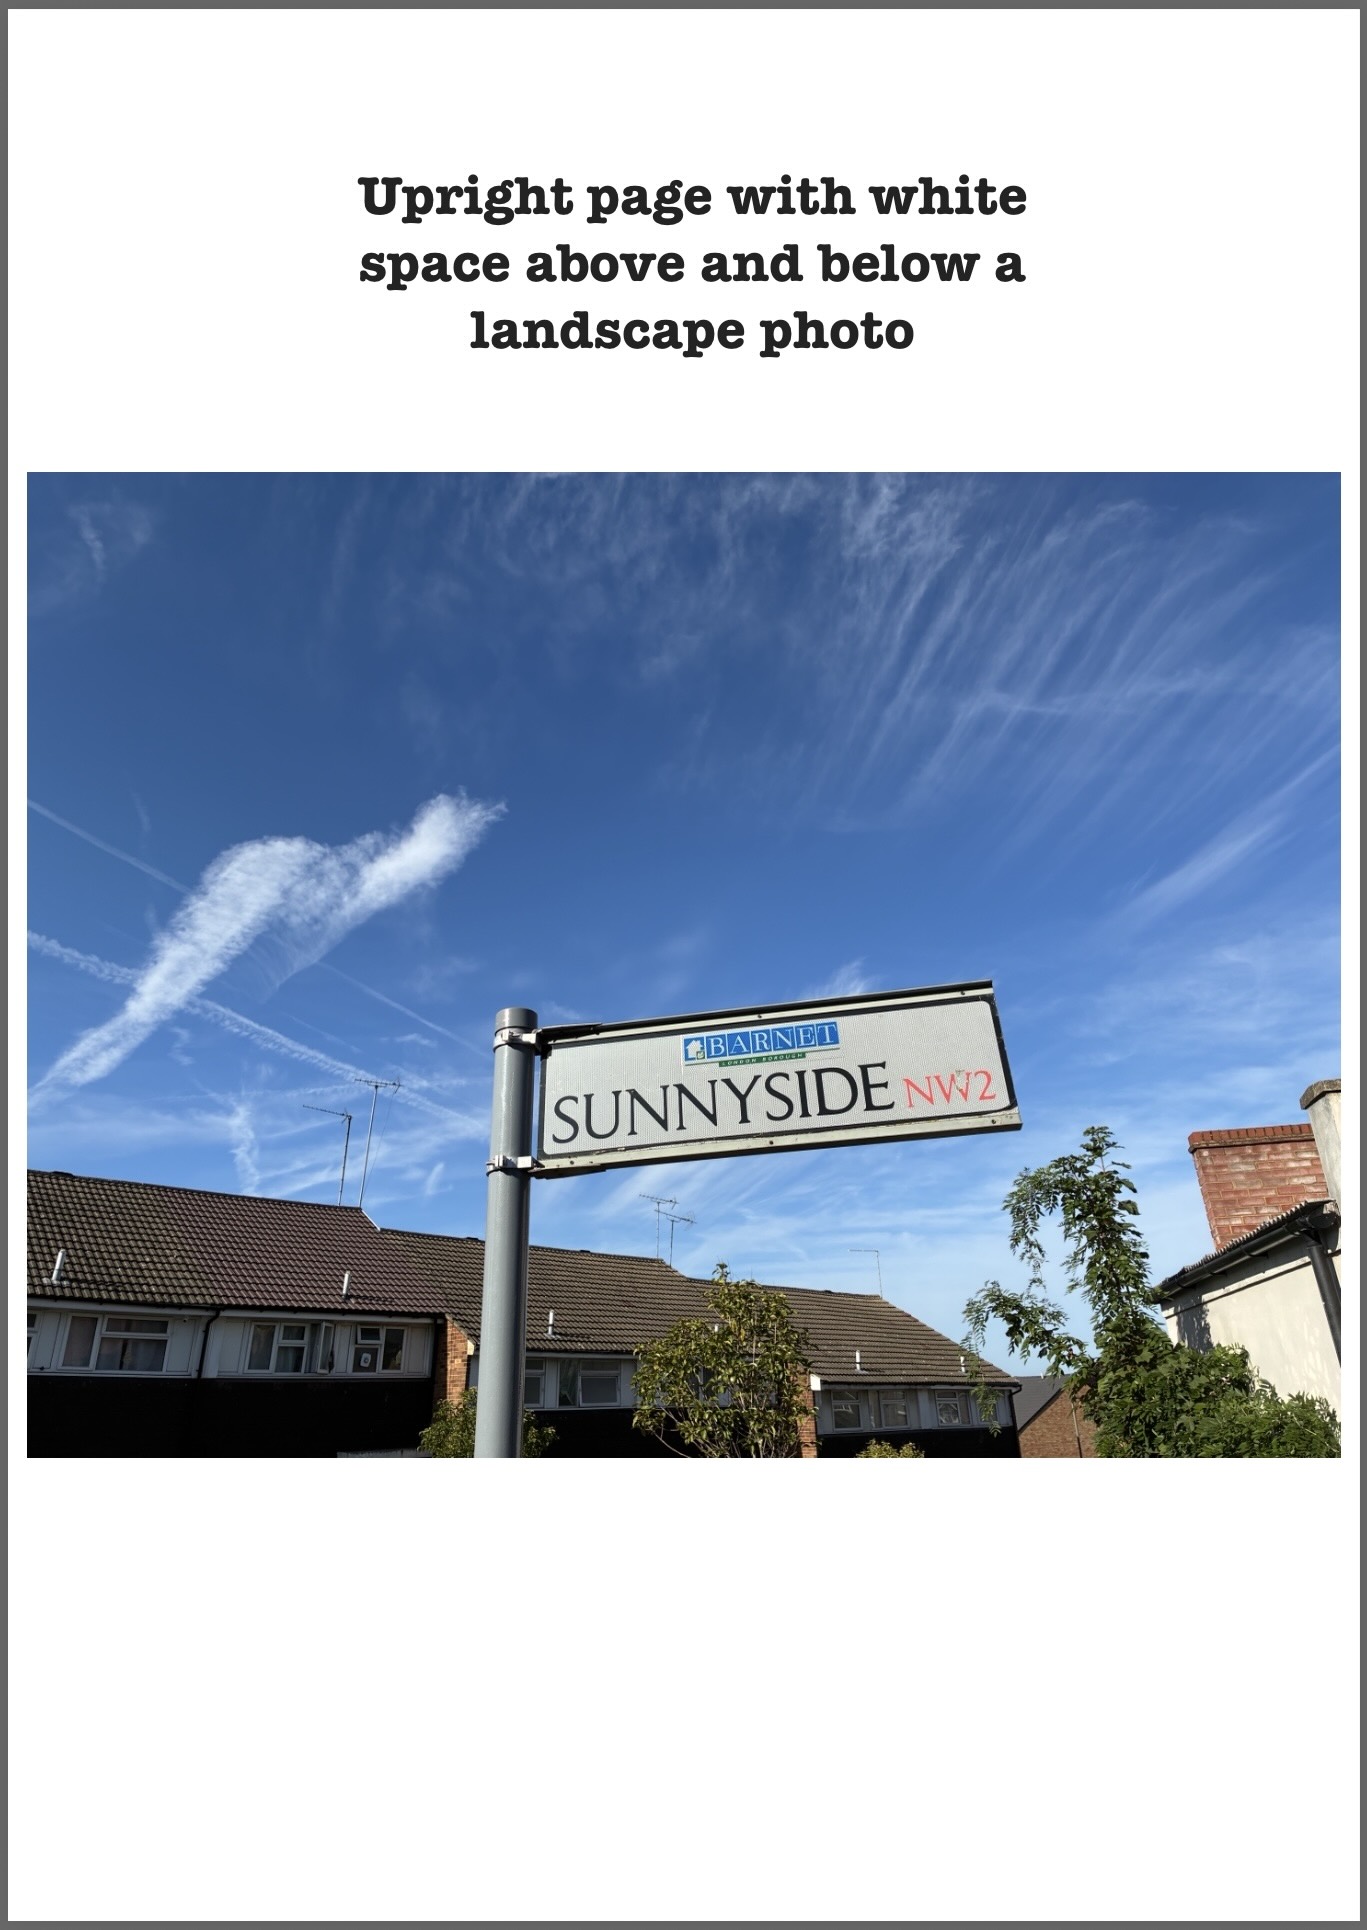
But you may also want very much to use a picture that is wide, not tall. That’s fine. Put it across an upright page, like a stripe, with space above and below. That space is useful: it’s where your words can go.
***
On a Mac
Left to itself, Preview turns a wide photo on its side, to fit the upright page:
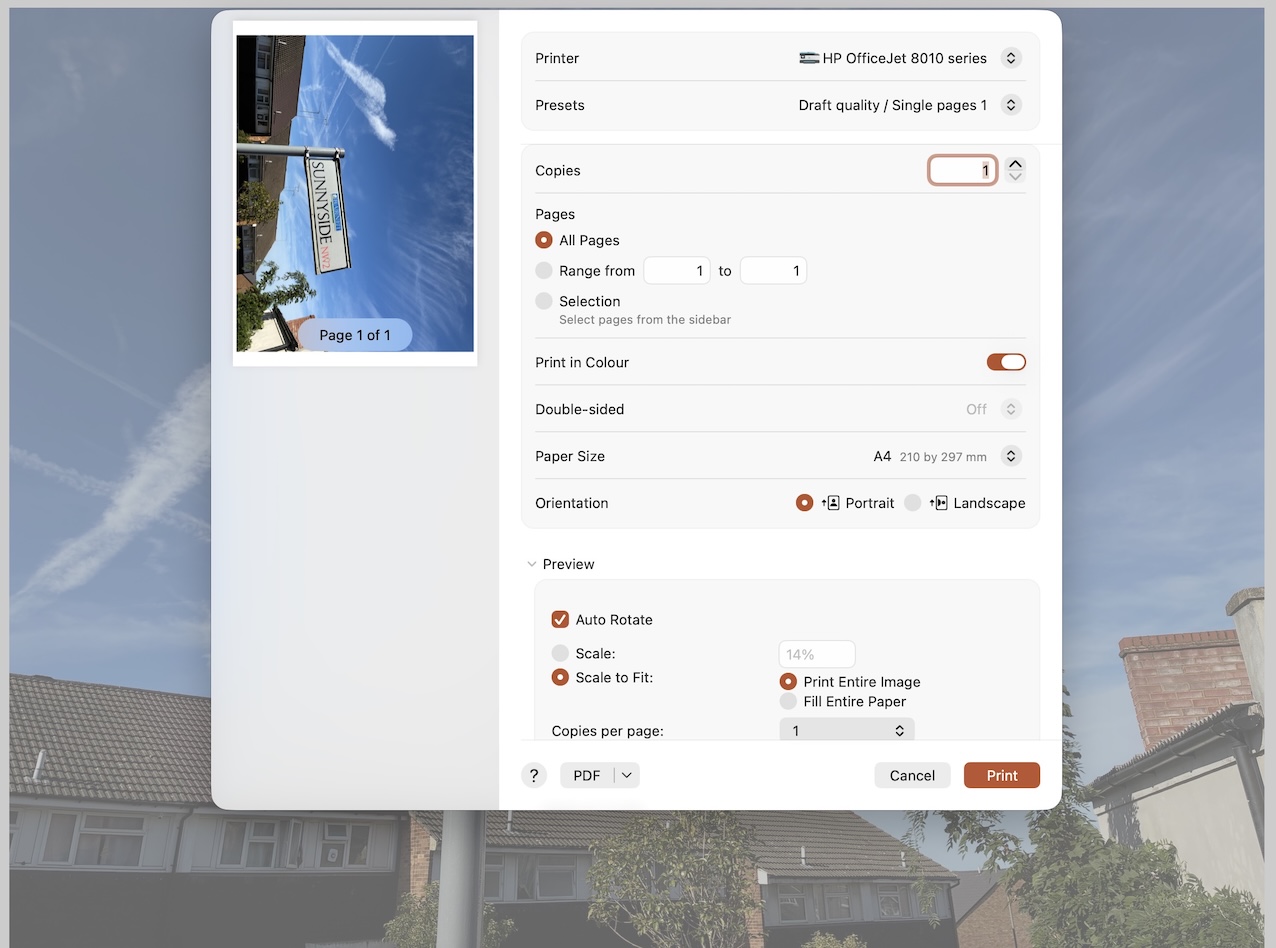
With Auto Rotate ticked, the picture fills the whole page, but sideways.
You may be happy to have a picture on its side in your Micro-Memoir. In which case: go ahead.
Otherwise, before saving, change a few things:
- Open the photo in Preview, then go to File, then Print.
- Check that Paper Size says A4, and Orientation says Portrait.
- Halfway down, under Preview, untick Auto Rotate. If you can’t see it, click the word Preview to open that section.
- Under Scale to Fit, choose Print Entire Image.
- At the bottom left, click the little arrow next to PDF, and choose Save as PDF.
The picture now runs right across an upright page, with white above and below:
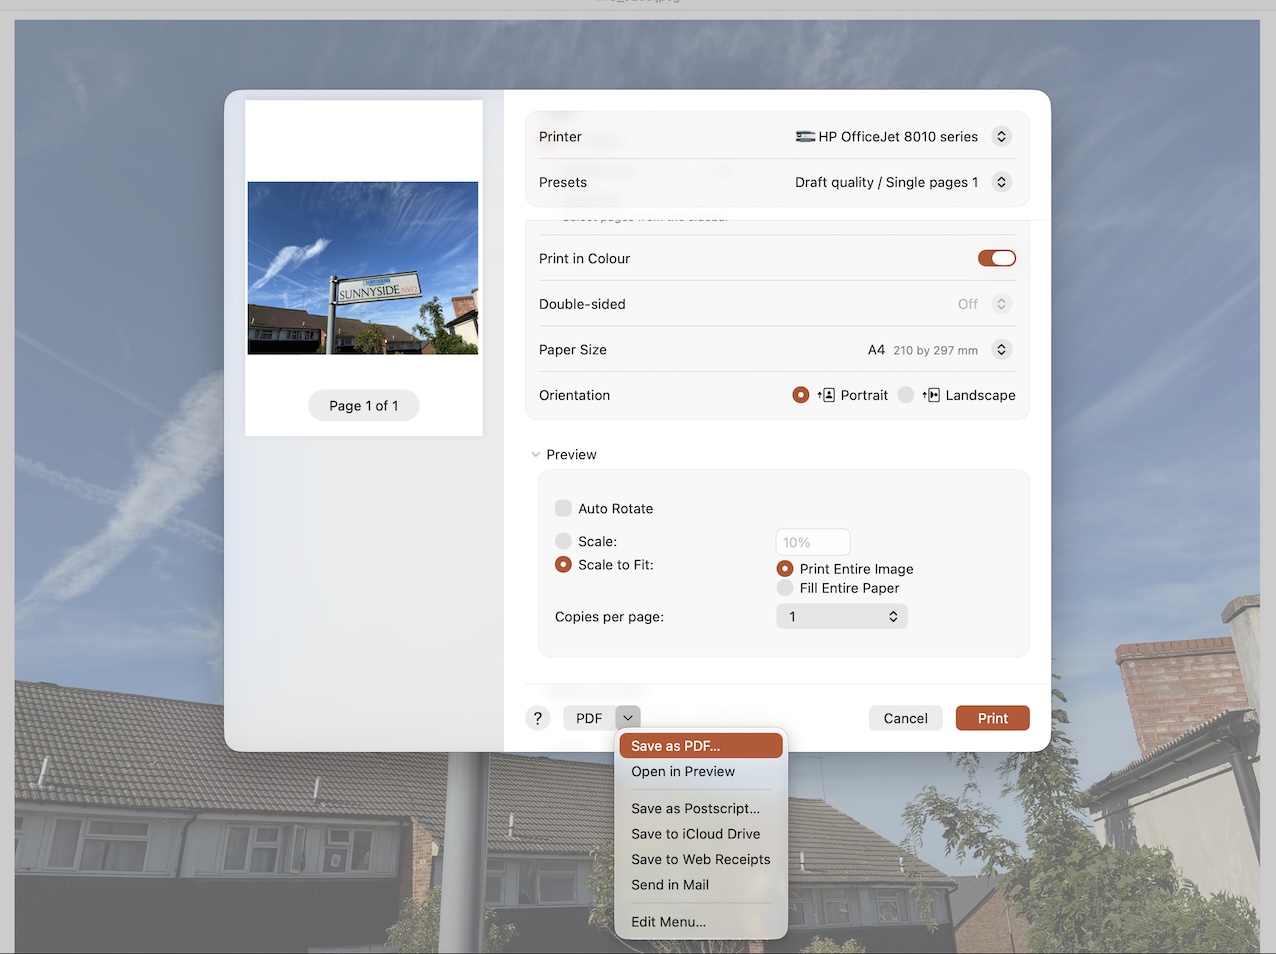
With Auto Rotate unticked.
***
In Google Slides
There’s less to do, because your page is already upright. Insert the photo, then drag its corners until it runs the full width of the page. Then drag it up or down to where you want it.
***
A few things that help
Decide where the words go before you place the picture. A photo near the top leaves a good block of space underneath for a paragraph. A photo in the middle leaves two smaller spaces, for a line above and a line below.
If you’d rather have no white at all, that’s what the double-page spread is for: how to split a photo across a double-page spread.

JPF