On Thursday’s Zoom call for my Micro-Memoir course, someone asked how to put pictures on a page and turn it into a PDF without a Mac. I go into this properly in the course emails, from day 23. But I didn’t want anyone fretting about it till then, so here’s the short version.
Use Google Slides. It’s free with a Google account, it works in your web browser, and it doesn’t mind what kind of computer you’ve got.
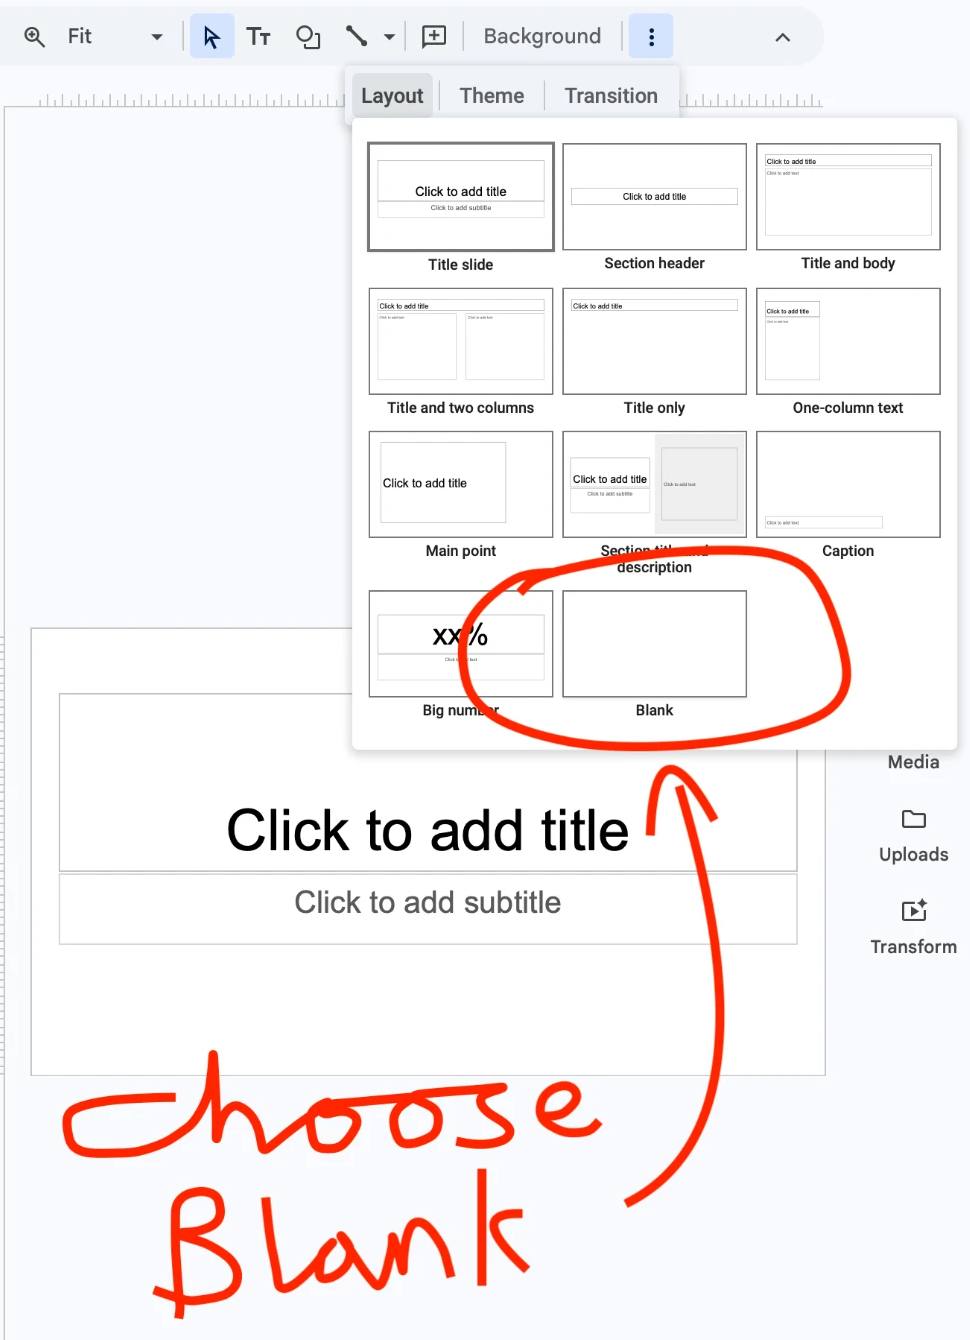
Start a new presentation at slides.google.com. Its first slide comes with boxes saying Click to add title. You don’t want those, so click Layout – it’s in the bar along the top, or behind the three dots at the end of it if your window is narrow – and choose Blank.
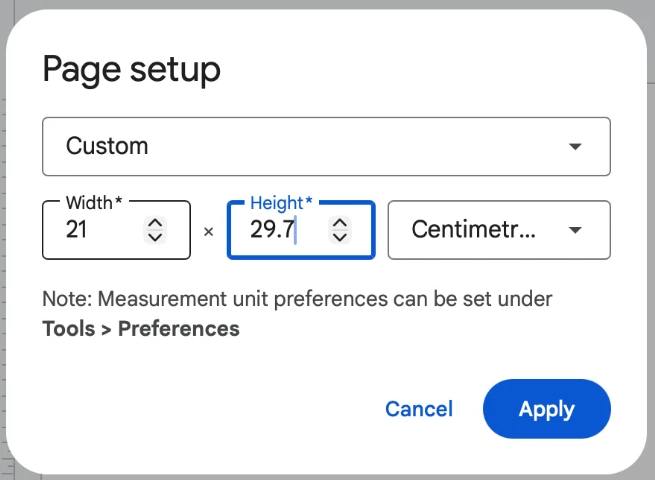
Next, make the slide the size of an upright A4 page. Go to File, then Page setup. Choose Custom, type 21 for the width and 29.7 for the height, choose centimetres, and click Apply.
As I said on the first Zoom, stick with A4 for now, even though your book will be printed at A5. A4 shrinks to A5 exactly: same shape, half the size.
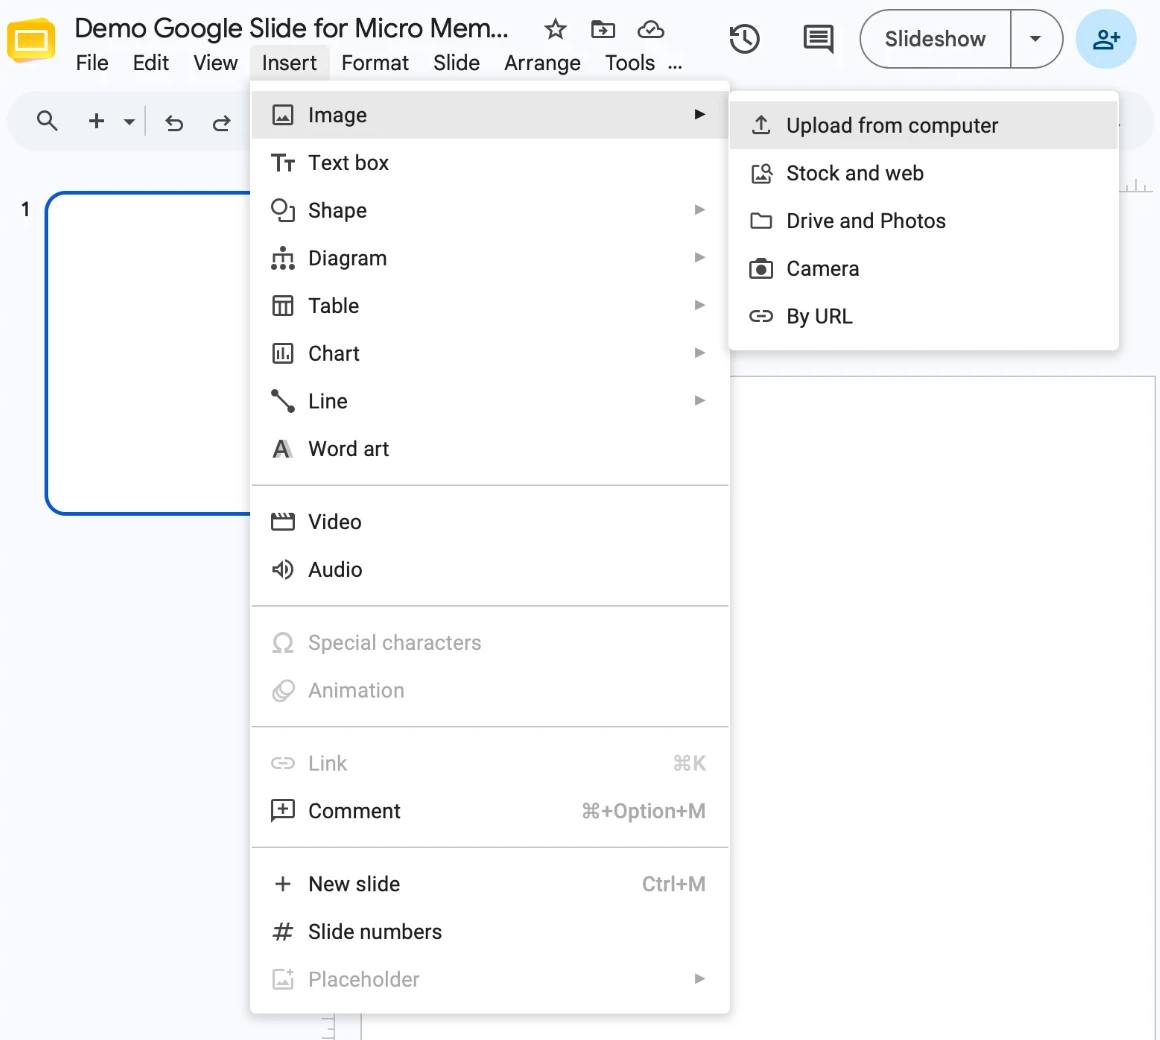
Now put your pictures in: Insert, then Image, then Upload from computer.
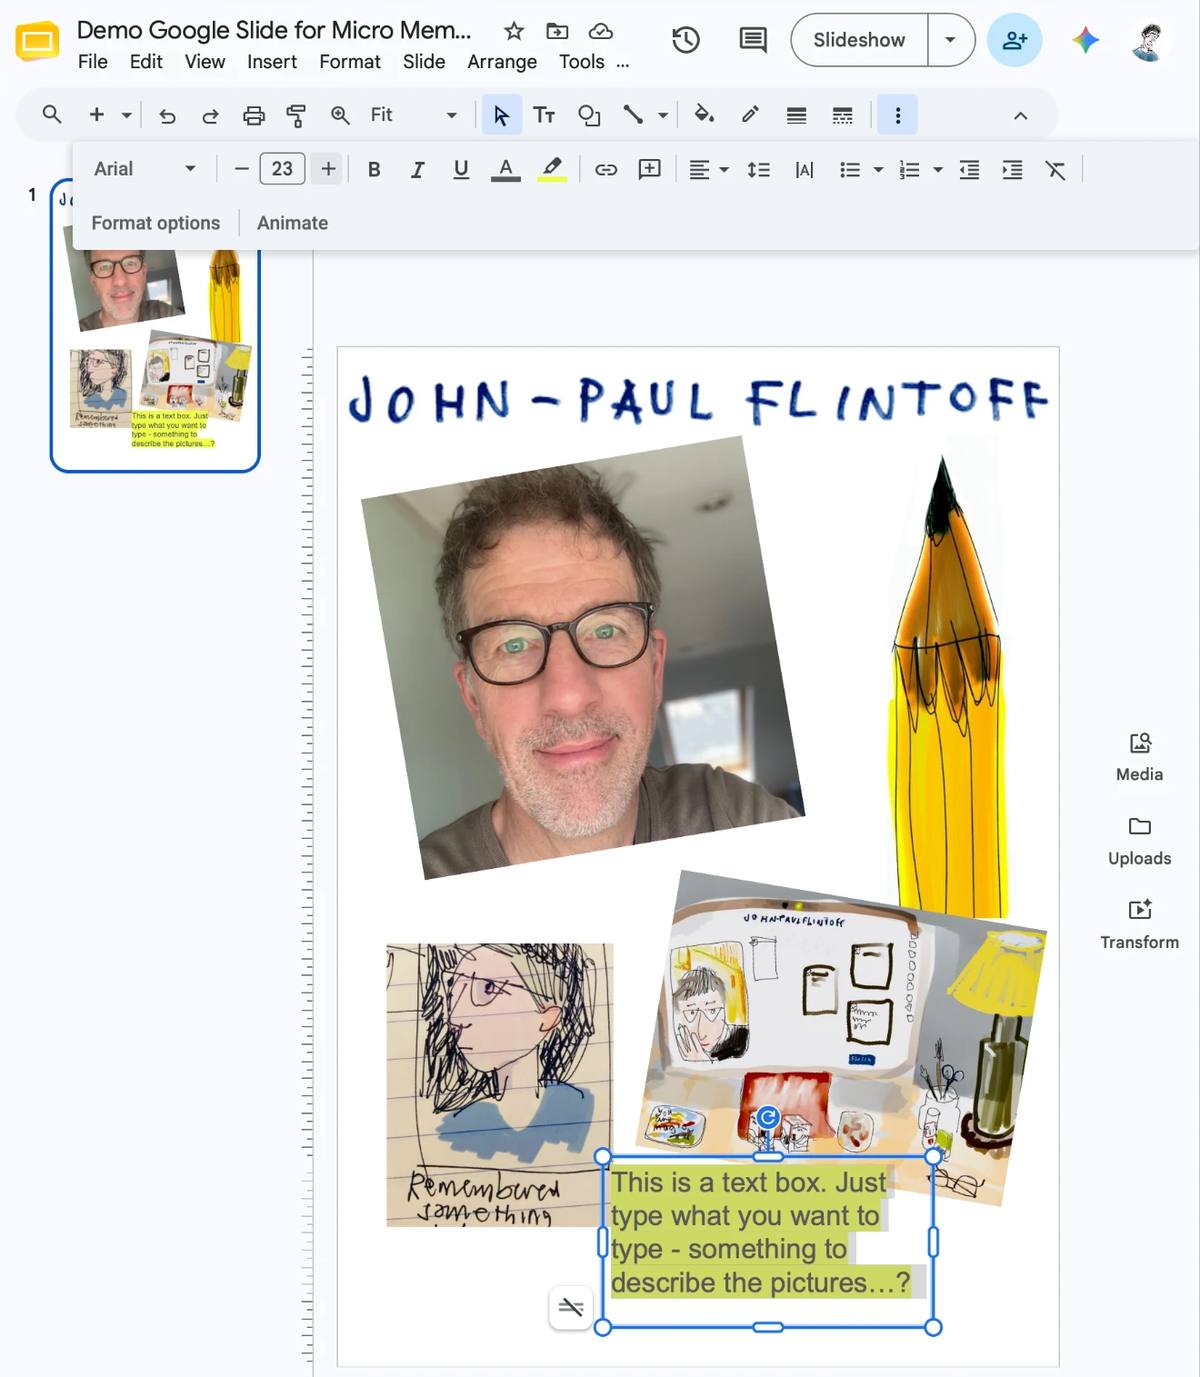
I chose to insert several pictures at once, and they landed like this:
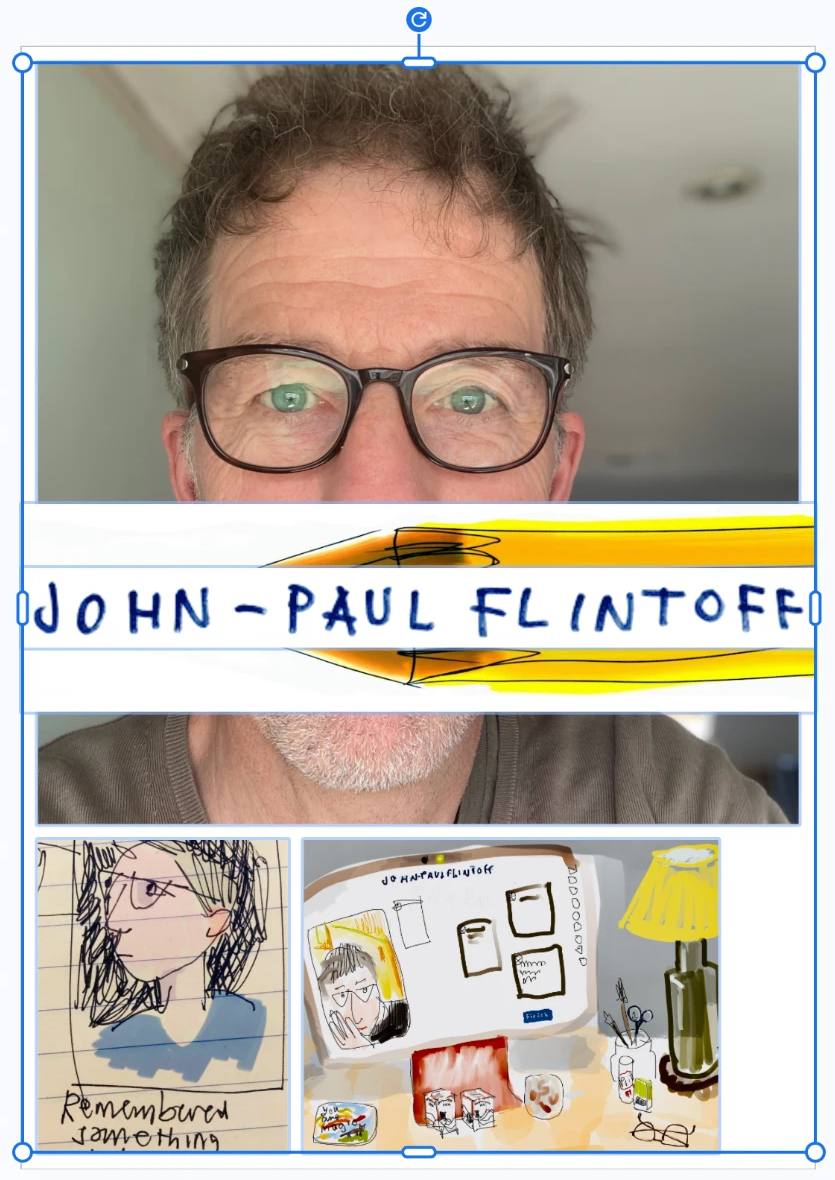
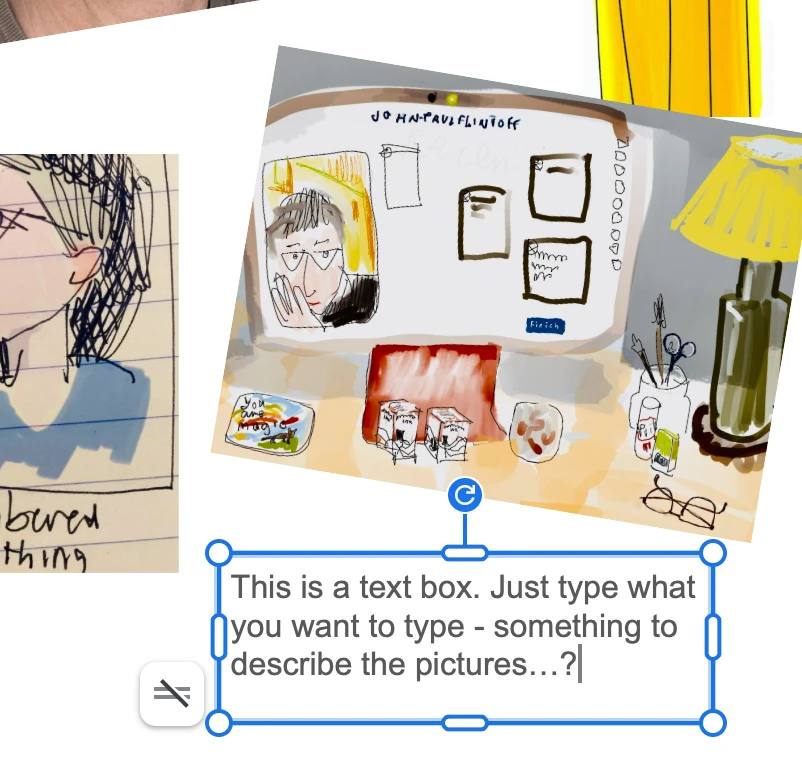
Click any picture and a blue box appears round it. Drag the picture to move it. Drag one of the circles at the corners to make it bigger or smaller. The circle sticking out above the box turns it – that’s how I tilted the photo of my face.

Keep moving things about till you’re happy.
If you want words on the page as well, go to Insert, then Text box. Drag out a box where you want the words, and type.
To change how the words look, select them first. The box that says Arial changes the font, and the number beside it changes the size. Make it bigger than you’d think: everything shrinks when the page becomes A5.
There’s no need to keep saving. Google does it for you as you go.
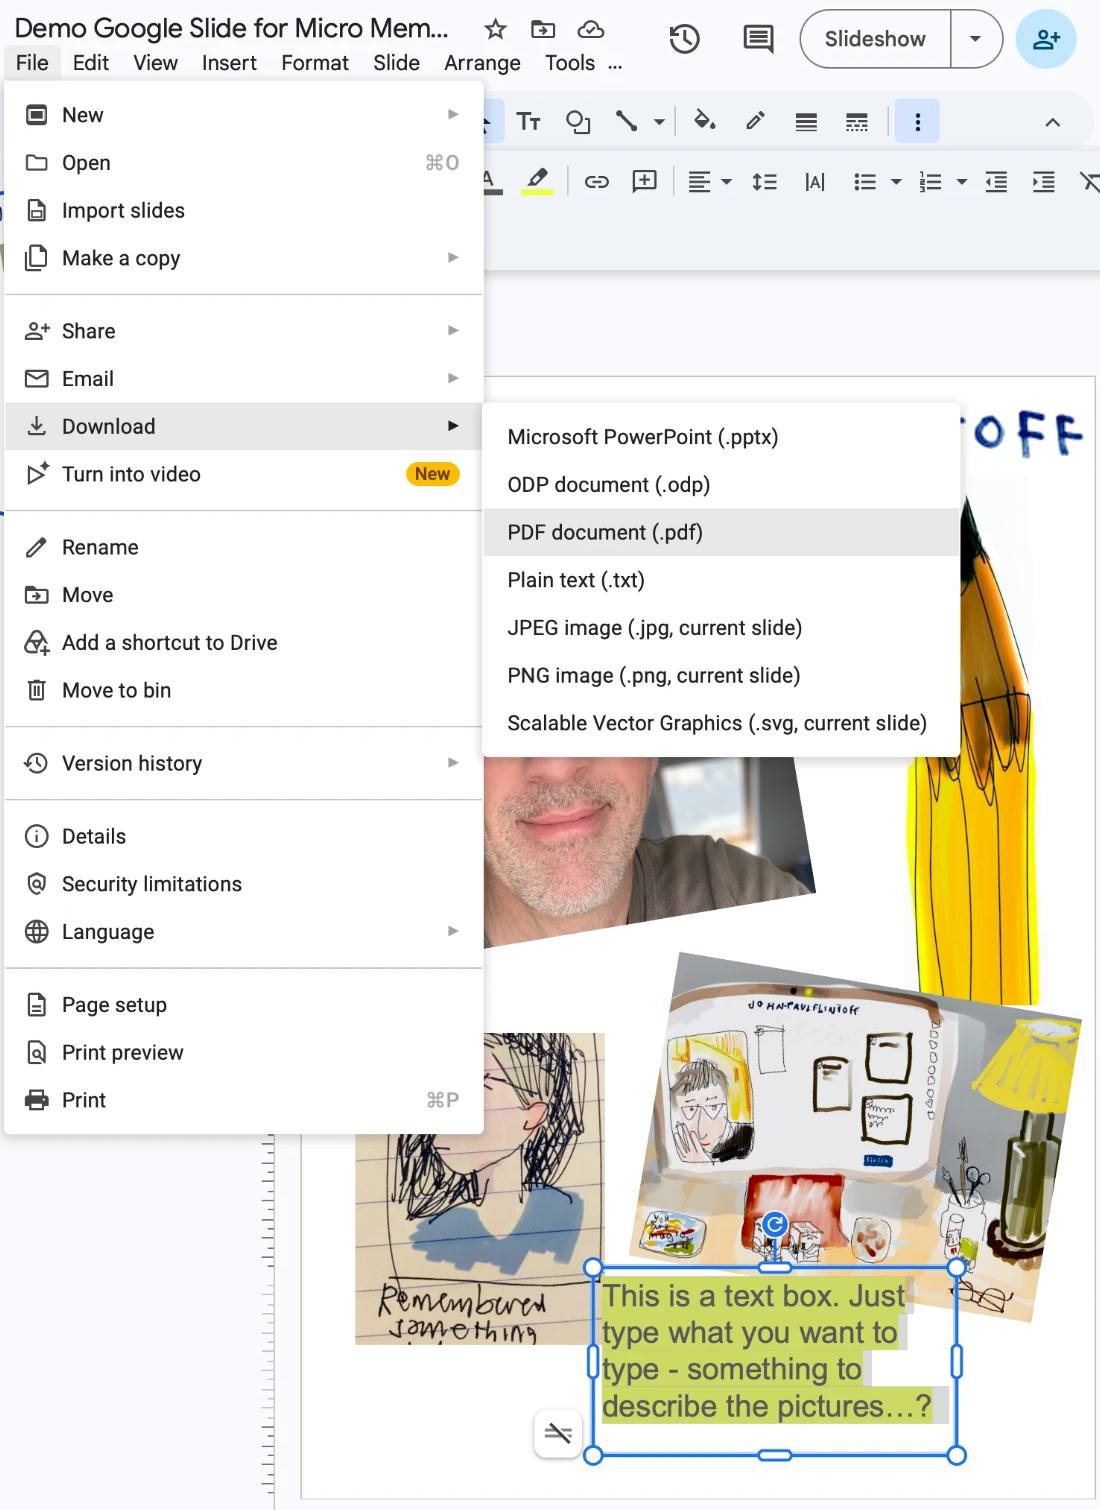
When it looks right, go to File, then Download, then PDF document.
That’s it. The PDF goes wherever your downloads usually go.

JPF